Thursday, June 26, 2008

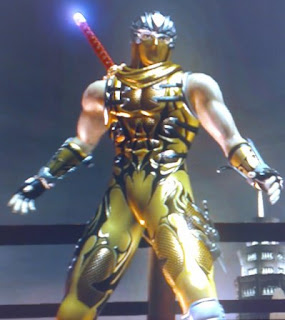
Ninja Gaiden 2 - Tips and tricks for the Master Ninja


1. Falcon Talons [Level 3]


- All humanoid enemies [Flying Swallow > Izuna drop]


- Werewolves, Purple fiends, Golden fiends, Red Dragon fiends [Direction+Y attack cuts off limbs very readily, leaving enemies open to OTs]


- Normal Bats, Ghost Fish [XXX attack is quick enough to deal with them]


- Genshin [Direction+X XXXX causes him to flinch]


- Zedonius form 1 [XXYY worked fairly well on him]


- Alexei [Flying Swallow + Y upon landing worked well]


- Volf [Flying Swallow, Direction+X if you land behind him after FS]


2. Dragon Sword [Level 2]


- Red Serpents, Grey Serpents, Dogs, Bat fiends [Flying Swallow]


3. Eclipse Scythe [Level 3]


- Centaurs, Spider fiends, Zedonius 2, Elizabet 1 & 2, Dagra Dai, Archfiend Reborn [Jump + XXYYY]- 4 Legged Pink Crab fiend [3 double charged UT's]


- Mech fiends [1 double charged UT > OT]


- Red fish [UT]


4. Kasuri-Gama


- Skeleton bugs, Pill bugs, Ghost bugs [UT]


5. Incendiary Shurikens


- Ranged enemies- Skull worms in acid room [Flying bird flip allows you to throw 2 at a time]


- Bugs


- Red Serpents, Grey Serpents


- Black dragon/bat fiends


- Fiends [Takes off limbs]


- Armadilos [Aim for their head]


6. Bow [Autoaim is essential]


- Ranged enemies


- Black dragon/bat fiends [Jump and shoot, it takes 3 shots, 1 double charged shot or 1 charged shot and 1 normal shot. Kill a few and use the essence to chain ET them]


- Chapter 9 Skull Worm boss [Stay in a side a cave and hit it with charged bow shots]


- Chapter 5 Water Dragon boss [Stay on the extreme left or right of the platform so that you have room to avoid the water attack by dashing to the other end. If he shoots those white needles, jump and press X with the Falcon Talons to avoid damage or just block to take alittle damage]


- Archfiend phase 1- Gray flying mechs in Chapter 9


7. Gatling Spear Gun


- Jelly fish


- Red Serpents, Grey Serpents


- Gray flying mechs in Chapter 9 [If you are low on health, go underwater and let the gun auto aim, this takes very long but you are 100% immune to any damage]


- Red fish


8. Art of the Piercing Void


- Line up a row of enemies and this is normally an instant kill


- Chapter 10 stairs


- 3 hits kills Spider fiends


- Useful in Chapter 13 against enemies in a straight, narrow room


- Dragon/bat Boss of chapter 9 takes alot of damage from this


9. Art of the Phoenix


- Stuns enemies


- Causes some damage in boss fights


- Protects against the blue skulls in Archfiend phase 1


10. Art of the Windblades


- Crowd control


- Useful in the Chapter 11 "epic" battle with alot of ninjas and 6 Spider fiends


11. Invincibility Frames [Use to avoid Incendiary Shuriken Damage]


- Furious wind


- Jumping on enemies heads-


Flying Swallow- Izuna Drop


- Falcon Talons [Direction+Y]


- Guilotiline throw


- OT


- UT


- ET


- Dash


12. Lives of the Thousand Gods


- Save them for Chapter 11, don't save 4 of them for Chapter 14 and struggle with a short life bar. I use all of my LOTTG on Chapter 11 because the later Chapters are much easier


- Use as full heals


13. Spirit of the Devils


- Save the 2nd one for the Chapter 11 "epic" fight


14. Save Points


- Save after every 1 or 2 encounters if you did not waste too much resources and have at least 3/5 HP


- Running from battles and saving before it disappears makes certain enemies disappear (You have to reload sometimes to make enemies disappear)


15. Running


- Know when to run because some fights are not worth your resources


16. Cutscenes


- Triggering cutscenes makes enemies disappear

Wednesday, June 25, 2008

Lost Odyssey - Quick Guide to defeating Professor K in 3 to 4 Turns


This is a video of my level 8x party taking on Professor K in the 400ms Point DLC, Seeker of the Deep. At 108800 HP, this guy may seem like a pushover, but one bad choice, coupled with Professor K's resistance, defence and reflect will have your party sprawled on the floor in no time.

This punishing dungeon has no save points and you'll spend at least 30 minutes turn tailing your way back to get another shot at the little fella.He may be harder than The Immortal One if you do not know what you're doing and get your party wiped out by Annihilation.

Most people that beat him used the new DLC items like Accelerator (Reduce casting time 3) or Rose Quartz (Turn Cast).These items are obtained from mini bosses you encounter in Random fights along the last 9 levels (16B to 24B). However, some people claim to never get these items (rare drop) even after 5 hours.

In this video, I will provide rough details on how to defeat Professor K in 3 Turns.

Minimum Requirements:
Level 80+ Immortals (At least 8000 HP)
The following skills:
Persistence
HP Boosting skills
Crisis Defence
Complete Defence
Level 8 White Magic
Level 8 Spirit Magic
Lucky 0 Magic Damage
Nullify all elements
Double Cast
Reduce Casting time 2
Mental Stability 2
Weapon Guard 2
Slot +5/Slot +10
Turn-tail

Before the fight, get your Immortals' HP down to 1 to 1000. You can do this by fighting Hellish Kelolons (Black Kelolons in 24B). Note that this must be done by 24B as there are no more random encounters after 24B. Attack these Kelolons normally and they will perform counters, usually taking your characters to near death. Use Complete Defence to keep low health characters alive and Turn Tail when all Immortals have yellow Hp.Health Sed to full health and put him in the front row (so he will tank the few Forceus that Professor K casts) and the Immortals in the back row.

Equip Sed with the Curse Crest, Holy Guard and Quad-Element Seal.Once the battle starts, just keep casting Reversa and hope for the best. If you're unlucky, Professor K will cast Reflect on his 2nd turn, meaning that your party will suffer 4 reflected Reversas hitting for about 40000 each. This is where Persistence pays off, if you have 2 HP or 860 HP, a 40000 reflected Reversa will only whack your HP down to 1. I took a big risk by taking 3 of my Immortals with 1 HP into the battle.

In total, I have faced Professor K 6 times. In the 4 times I failed against him it was always because my party or the majority of the party got wiped out. Sure you can use divide and complete defense but that means that your party can last only so many turns. Because Professor K always has Regenerus and Annihilation at his disposal, you will never be able to cover the 20400 HP he heals while ressurecting your party members who fall to Annihilation. This is definitely not a fight you can win if you play defensively and stretch it out.

Xorn


Body Type (-25) – Advanced options
Neck: d
Chest: d
Shoulder: 0, 70, 0
Abdomen: d
Waist: d
Arm: 20, 20, 0
Hands: 50, 50, 50
Legs: d
Feet: d

Body Height – 6’1’’

Head Morphing
Head: -40, 70, -4
Forehead: 100, -100, 100, 0

Face Morphing
Eyebrows: -57, 100, -100, 100
Eyes: 100, 100, -15, -22, 0, 100, 100
Nose: -100, 97, -100, -100, -100, -100, 17, 100
Cheeks: 100, -100, -100, 24
Mouth: 100, -100, 100, -72, 100, 100, -100
Jaw:-100, 15, -38, 53, 100, 0
Ears: -100, 0, 0, -100
-------------------------------------------------------------------------------------

Steps:
Pay attention to the x and y values for this particular caw. A fair share of his layers have x at default.

1. Hair 2.
2. Skin tone 1. [-100y -25s 100sp]
3. Mask 20. [-100y -19s]
4. Horns 15. [-100y -19s]
5. Mask design 39. [-100y -14s]
6. Face paint 63. [-100y 2s]
7. Face paint 51. [-100y -4s]
8. Face paint 83. [-100y 6s]
9. Make-up 19. [-7x 100y 100s]
10. Make-up 4. [-7x 100y 36s]
11. Gloves 2. [87x -46y 23s]
12. Torso accessory 7. [-100y 25s]
13. Torso accessory 12. [-100y -29s]
14. Torso accessory 13. [-100y -12s]
15. Shoes 1. [-100s]
16. Wrestling tights 1. [-100s]
17. Tops 7. Open, tucked. [72x -10y 55s]
18. Right arm symbol 103. (8 symbols). Max scaled. Use 8 of these to turn the entire sleeve black. Leave the cuffs of the sleeve yellow. [-100s]
19. Left arm symbol 103. (8 symbols). Repeat the 8 symbols on this arm. [-100s]
20. Belts 10. [72x 100y -10s]
21. Torso symbol 92. (4 symbols). Max scaled and rotated. Move it in line with the black from his sleeves, forming a big yellow X. [-100s] Repeat for the other side of his torso.
22. Repeat the previous step for his back. [-100s]
23. Left arm lettering. (Alphabet 14/18). “o”. H-scale and V-scale up once. Move it to his bicep. [72x 10s]
24. Left arm lettering. (Alphabet 14/18). “x”. Move it to his bicep, into the o. [72x 10s]
25. Repeat steps 23 and 24 for his right arm.
26. Torso symbol 123. Rotate and smallest size. Move it to the middle of his belt. [-100s]
27. Torso lettering. (Alphabet 14/18). “o”. Rotate, H-scale and V-scale up once. Move it to his belt buckle. [72x 10s]
28. Torso lettering. (Alphabet 14/18). “x”. H-scale up once. Move it to his belt buckle. [72x 10s]
29. Left leg symbol 102. V-scale down once and H-scale up once. Move it to the top of his boot. [72x 10s]
30. Right leg symbol 102. V-scale down once and H-scale up once. Move it to the top of his boot. [72x 10s]


Wolverine


Body Type (-12) – Advanced options
Neck: -100, 65, 100
Chest: 20, 20, 20
Shoulder: 100, 100, 100
Abdomen: -28, 15, 8
Waist: 45, 0
Arms: 70, 40, 40
Hands: 100, 100, 100
Legs: -25, 10, 15
Feet: d

Body Height – 5’5’’

Head Morphing
Head: -25, 0, 0
Forehead: 100, -100, 100, -100

Face Morphing
Eyebrows: 0, 0, 0, 44
Eyes: -40, 0, 0, -70, 0, 0, 62
Nose: 19, 84, -54, 0, -9, 25, 20, -15
Cheeks: 19, -100, 10, 8
Mouth: -18, -15, -60, -30, -70, -100, -100.
Jaw: 64, 20, 40, 25, 100, 50
Ears: 100, 0, -100, 0
-------------------------------------------------------------------------------------

Steps:
1. Wrestling attire 13. [74x 100y 10s]
2. Tops 3. Skin tight, untucked. [-25x -35y -30s 25L]
3. Tops 3. Skin tight, untucked. [74x 100y 100s 8L]
4. Underwear 4. [-25x -35y -40s]
5. Belt 10. [-100x 100y]
6. Torso Lettering: Alphabet 1/18. Capital X. V-scale down once. Move it into the middle of his belt. [-100s]
7. Gloves 4. [-25x -35y -30s]
8. Shoes 7. [-25x -38y -40s]
9. Hair 2
10. Torso symbol 92. Rotate, V-scale down once, H-scale up once. Move it to the stripe to his right ribcage (your left), refer to picture. [Black]
11. Torso symbol 92. Rotate, V-scale down once, H-scale up once. Move it to the stripe to his left ribcage (your right), refer to picture. [Black]
12. Left ribcage stripe 2. Torso symbol 92. Rotate, V-scale down once. [Black]
13. Left ribcage stripe 3. Torso symbol 92. Rotate, V-scale down once. [Black]
14. Right ribcage stripe 2.Torso symbol 92. Rotate, V-scale down once. [Black]
15. Right ribcage stripe 3. Torso symbol 92. Rotate, V-scale down once. Black]
16. Torso Symbol 103. H-scale down twice. Move it in between his head and left arm. Move it as high as possible, you will know you have pushed it too high up when it starts to appear on his thigh. [Black]
17. Torso Symbol 103. H-scale down twice. Move it in between his head and right arm. [Black]
18. Back Symbol 103. H-scale down twice. Move it in between his head and left arm. Joining the one in front. [Black]
19. Back Symbol 103. H-scale down twice. Move it in between his head and right arm. Joining the one in front.
20. Torso Symbol 92. H-scale down twice. Move it into the black rectangle on his left breast. [Black]
21. Torso Symbol 92. H-scale down twice. Move it into the black rectangle on his left breast. [Black]
22. Back Symbol 92. H-scale down twice. Move it into the black rectangle on his left back. [Black]
23. Back Symbol 92. H-scale down twice. Move it into the black rectangle on his right back. [Black]
24. Body hair (Arm hair) 4.
25. Mask 17. [74x 100y 11s]
26. Mask 21. [74x 100y 11s]
27. Face Paint 56. [87x 46y]
28. Facial hair (Sideburns). 16. [-100y -15s 50a]
29. Facial hair (Template). 7. [-100y -15s 20a]
30. Horns 11. [-25x 29y -35s]
31. Face paint 79. [-25x 60y 45s]
32. Head symbol 103. Rotate and max scale. [74x -4y 62s]. Use 3 of these symbols to cover the “skin” above the blue facepaint surrounding his eyes.
33. Move these 3 head symbols so that it goes before facepaint 79.

Now remember this colour [-25x -35y 10s], I will refer to it as [W. blue]

34. Head symbol 104. Max scale. Move it in line with the right horn and the face paint, it should fit perfectly. [W. Blue]
35. Head symbol 104. Max scale. Rotate and move it in line with the left horn. [W. Blue]
36. Head symbol 103. Max scale. Move it to his left temple. Move it so that it connects to symbol 104. It should just cover his left ear. [W. Blue]
37. Head symbol 103. Max scale. Move it to his right temple. Move it so that it connects to symbol 104. It should just cover his right ear. [W. Blue]
38. Head symbol 103. Max scale. Move it to his left cheek, place it in line with the blue mass. It should cover his cheek up to his jaw. [W. Blue]
39. Head symbol 103. Max scale. Move it to his lower right cheek. [W. Blue]
40. Head symbol 103. Max scale and rotate. Move it over his left cheek bone and bridge of his nose. Make sure there are no gaps. [W. Blue]
41. Head symbol 103. Max scale and rotate. Move it over his right cheek bone and nose. [W. Blue]
42. If there are any more gaps, fill them with [W. Blue] symbol 103’s.
43. Head symbol 103. V-scale up once and H-scale down once. Move it onto the bridge of his nose. [74x -4y 62s]


Venom


Body Type (-100) – Advanced options
Neck: -100, 100, 100
Chest: 10, 10, 45
Shoulder: 100, 100, 35
Abdomen: 40, 35, 0
Waist: 25, 25
Arm: 100, 20, 20
Hands: 100, 100, 100
Legs: -30, -15, 34
Feet: 0, 11, 100

Skin tone – 1 [Shade -100]

Body Height – 6’2’’

Head Morphing
Head: 100, 50, -20
Forehead: 0, 0, 0, 0

Face Morphing
Eyebrows: -100, 100, -100, 100
Eyes: All 100
Nose: -100, 100, 100, -100, 100, 100, 100, -100
Cheeks: 0, 0, 0, 0
Mouth: -100, -100, -15, 0, -100, -100, 100
Jaw: 100, -40, 9, 100, 100, 100
Ears: 100, 54, -100, -100


Steps
1. Hair 2
2. Mask 21. [-100s]
3. Mask design 39. [-100s]
4. Mask design 48.
5. Face paint 97. [-100s]
6. Face Paint 107. [-100s]
7. Head symbol 98. H-scale and V-scale up once and move it over the left side of his mouth (your right). [-100s]
8. Head symbol 98. H-scale, V-scale up once and rotate. Move it over the right side of his mouth (your left). [-100s]
9. Head symbol 97. Max scale and move it down to the middle top portion of his mouth. [-100s]
10. Head symbol 103. Any size. Use 3 of these to cover all red-pink face paint, excluding the mouth. [-100s]
11. Make up 1. Biggest style. [-100y 100s]
12. Face paint 79. [-100y 100s]

For all of the remaining head symbols, use [-100y 60s].
13. Head symbol 98. H-scale down once and V-scale up twice. Move it into his right eye (your left). Angle it inwards at the outer end of his right eye.
14. Head symbol 98. H-scale down once, V-scale up twice and rotate. Move it into his left eye (your right).
15. Head symbol 98. H-scale down twice and V-scale up once. Move it into his right eye (your left), place it at the nose-end of his eye.
16. Head symbol 98. H-scale down twice, V-scale up once and rotate. Move it into his left eye (your right).
17. Head symbol 98. H-scale down once and V-scale up once. Move it into his left eye (your right). Place it in between the 2 symbols there to give his eye more volume and shape.
18. Head symbol 98. H-scale down once, V-scale up once and rotate. Move it into his right eye (your left).
19. Right hand symbol 103. V-scale down once and move it onto his backhand. [White]
20. Left hand symbol 103. V-scale down once and move it onto his backhand. [White]
21. Torso symbol 97. Place it in the middle of his chest, centered on his sternum. [White]
22. Torso symbol 103. V-scale and H-scale down once. Move it to the top of symbol 97 to form the spider’s mouth. [-100s]
23. Torso symbol 97. H-scale up once and V-scale up once. Move it below, but intersecting the smaller symbol 97. This forms the left half of the spider’s thorax.
24. Torso symbol 97. H-scale up once and V-scale up once. Move it below, but intersecting the smaller symbol 97. This forms the right half of the spider’s thorax.
25. Torso symbol 103. V-scale down once and move it down to the bottom of the spider’s thorax. [-100s]

I will describe how to make 1 side of 4 of the spider’s legs. You will have to repeat steps 26 to 33, remembering to rotate the correct symbols (all except symbol 99). Use [White] for all.
26. Torso symbol 100. V-scale down once. Move it to the left pec (your right), place it at a 90 degrees angle with the spider’s fang. {Spider leg 1}
27. Torso symbol 100. V-scale down once. Rotate connect it to the previous symbol. {Spider leg 1}
28. Torso symbol 100. V-scale down once. Place it below leg 1. {Spider leg 2}
29. Torso symbol 100. V-scale down once. Join it to the previous symbol. {Spider leg 2}
30. Torso symbol 99. V-scale, H-scale down once and rotate. Place it below leg 2. {Spider leg 3}
31. Torso symbol 100. V-scale down once and rotate. Join it to the previous symbol. {Spider 3}
32. Torso symbol 100. V-scale, H-scale down once and rotate. Move it below leg 3. {Spider leg 4}
33. Torso symbol 98. H-scale down once and rotate. Join it to the previous symbol. {Spider leg 4}
34. Repeat steps 26 to 33, rotating all symbols except 99.
35. After completing the front logo, you should be at 50+ layers. Obviously you can’t do the same for the back. So you can choose to make a spider with 6 legs like that on the front or opt for the easier option of:
36. Back symbol 26. Max scaled. [White]


Thor


Body Type (-70) – Advanced options
Neck: d
Chest: 0, 70, 36
Shoulder: 41, 100, 46
Abdomen: -35, 21, 0
Waist: d
Arm: 0, 20, 0
Hands: 100, 100, 100
Legs: 15, 0, 0
Feet: d

Body Height – 6’6’’

Head Morphing
Head: -10, 8, 0
Forehead: All -100

Face Morphing
Eyebrows: -19, 13, -100, 100
Eyes: 4, -20, 40, -22, 0, 100, 15
Nose: -10, 40, 0, -7, 6, 37, 17, 14
Cheeks: -30, -20, 0, 0
Mouth: 0, 0, 0, 0, 0, 54, -78
Jaw: 11, 15, 18, 40, 100, 30
Ears: d
-------------------------------------------------------------------------------------

Steps:
1. Definition 8.
2. Eye 1. [Blue]
3. Eyebrow 35. [80x 0y 24s]
4. Lips 1.
5. Hair 31. [80x 25y 40s 100hs]
6. Wrestling Tights 16. [-18x 0y -10s]
7. Kneepads 15. [-65s]
8. Socks 1. Pattern 15. [83x 100y -3s 61L]
9. Shoes 14. [73x -15y 3s]
10. Underwear 5. (Add). [-100y -65s]
11. Top 5. Skin tight, untucked. [-100y -55s 18L]
12. Wristbands 1. [-100x -11y -36s 10L]
13. Facial Hair Template 17. [80x 6y 46s 70a]
14. Torso accessory 11. [-100y -100s 0a]
15. Hat 8. Style, move left once. Pattern 6. [-100y -10s]
16. Horns 8. [-100y 100s]
17. Torso symbol 103. (5-6 symbols). Rotate, max H-scale, smallest V-scale. Use 5-6 of these to form a yellow belt around his waist. Note that you have to place the belt slightly higher to allow enough room for the later steps. [72x 100y 50s]
18. Torso symbol 10. V-scale down once and rotate twice. Use this as his belt buckle. [72x 100y 70s]

19. The last 6 layers are for the 6 circles on his torso; 3 levels, 2 each. For these 6 symbols, use Torso symbol 97. [-100y 10s]

- Pec level: Rotate, H-scale down once and V-scale up twice.

- Abdomen level: Rotate, H-scale down once and V-scale up once.

- Groin level : Rotate, H-scale down once.

The Thing


Body Type (-100) – Advanced options
Neck: -100, 35, 100
Chest: 25, 14, 100
Shoulder: 43, 100, 71
Abdomen: -100, 75, 30
Waist: 70, 44
Arm: 3, 100, 30
Hands: 100, 100, 100
Legs: -100, 30, 22
Feet: 0, 0, 100

Body Height – 6’0’’

Head Morphing
Head: -15, 100, 0
Forehead: -100, -100, -100, -100

Face Morphing
Eyebrows: -100, 100, 100, 100-
Eyes: 7, -18, -13, -100, 0, 100, 34
Nose: -100, -100, -100, -100, 100, -33, 100, 25
Cheeks: 25, -100, 39, 72
Mouth: 100, -100, 100, 0, 100, 100, -100
Jaw: -100, 41, 23, 72. 100, 0
Ears: 100, 12, 11, -100
-------------------------------------------------------------------------------------

Steps:
1. Skin tone 1. [78x 100y -2s -100sp]
2. Eyes 2. [Blue]
3. Hair 2
4. Mask 17. Pattern 39. [81x 77y 14s 92a]
5. Gloves 2. Pattern 39. [83x 100y -5s 55a]
6. Tops 3. Skin tight, tucked. Pattern 39. [86x 59y 9s 55a]
7. Tights 1. [-18x -25y -36s]
8. Shoes 31. [-100s] for 1st colour. [-18x 100y -40s] for 2nd colour.
9. Belt 1.